Pages

Shabby blogs background

Showing posts with label Paige's Baby scrapbook. Show all posts

Thursday, January 26, 2012

Layout for Get Picky

I'm determined to enter at least one (preferably more) scrapbook challenges each week. Today I have a layout to show you that I did using a sketch from Get Picky.
Here's the sketch and my take on it.


I'm still working my way through my basket o' memories (see this picture) and these pictures seemed perfect for this sketch. I replaced the 3rd photo in the sketch with a journaling block.

I don't normally embellish my journaling blocks but this one was crying out for a couple touches so ... voila! 

And finding a piece of ribbon with the words "ma ma" on it was serendipitous to say the  least!

Close up of the title. I added the subtitle because I really wanted to high light that milestone in Paige's history.

This was a fun embellishment to make. I'd punched out 3 circles from a piece of transparent paper I found in my scrap drawer intending to use them as the sketch showed but felt this corner of the layout needed something ... more ... if you know what I mean. So I took a Jillibean Soup journaling spot and added the circles to it. Then it needed something in the centre so I started playing with another piece of the same ribbon from the journaling block and made this little rose bud type thing. Then I knew I needed to add one of my Twelve embellishments for Family Stories and found this orange flower in my tin. It all started coming together! Once the rose bud was glued on it looked a little lonely so I cut out some leaves and added them. 

There you have it. Thanks for stopping by!

Friday, September 23, 2011

A MotherLOAD Layout!

I have been a bit disappointed in myself for not playing along with the actual LayOut A Day portion of the MotherLOAD class that I'm currently enrolled in. Life has been ... well, hectic this month, to say the least! School started up again, Paige had that 2 week painful graduated entry to get through, my Stampin' Up! business is hogging all my family scrapping time ... you see? Hectic.

But yesterday I made a commitment to myself to do something creative everyday. Whether that be a Stampin' Up! sample for a workshop or swap, or (hopefully) a scrapbook layout for our family albums, I just need to create! I miss it! I need it!!! So, last night at 10:00PM I headed into my craft room, put on the latest Mind Aware Teleseminar replay, pulled out my notebook with those lists of LOAD prompts, grabbed a snack bag and got busy. Within an hour I came up with this.


I tell ya', Lain Ehman is a genius! Those snack bags were such an awesome idea! It had the journalling tags, the felt flowers, the brads and the buttons in it which didn't seem like a lot at the time I made them up, but boy did they ever make my life easier last night!

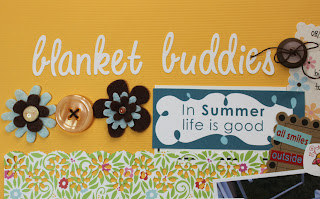
Here's a close up of the title block.

And another close up of the journalling block. The letter stickers and this little birdie plus the word stickers are Bella Blvd (as is the patterned paper).

Now, I make no promises to start creating a layout a day following Lain's prompts (a month behind schedule?) but this was fun and I will definitely do it again soon! 

Thursday, August 18, 2011

MotherLOAD Week 7

I received my weekly MotherLOAD email this morning ... we're into week 8 now. Hmmm ... I finished the layout for week 7 yesterday ... Oh well. Life has been busy and taken a turn for the crazy(er). While I have been spending hours in my scrap room/office, it's mostly been reading up on Stampin' Up! stuff, trying to figure out their site and learning about the fine art of Direct Sales. Ugh. Not sure I'm really cut out for all this cold calling and stuff but I'm doing my best to give it a shot.

But back to Week 7 ... we were to create a layout that conveyed a theme or emotion without using words. Here is mine, can you guess what my theme/emotion is?

If you guessed "play" you are correct!
Ways this says play: bright colours, diagonal placement of the circle elements (putting things on the diagonal suggests movement - there, my interior design training just paid off!! LOL!) and the circle elements themselves. Marley said they look like bubbles and while that wasn't the intention, she's right. This also adds to the playfulness of the layout, don't you think? I didn't add a title because I didn't feel it needed one. Sometimes, I think you can get away with no title. Let the pictures and your journalling speak for themselves.

And speaking of journalling, here's a close up of mine.

Products used: Cardstock - Bazzill (yellow) and scraps (white); Patterned paper - Bella Blvd and AC; Cicles - punched with my Cuttlebug (it's for sale on Craigslist if you want it!) and the Nestabilities circles. 

For week 8 Lain is talking about Inspiration and how we can get overwhelmed with our inspiration - too many ideas, too much product, too many photos. Check out this great post from layoutaday.com about burnout.  It is so timely as I've been feeling overwhelmed and not in a scrapping "mood". Since doing all those Apron Strings challenges in July, I've barely scrapped anything. I'm falling behind on my MotherLOAD work, I've printed the pictures for my July P12 layout but done nothing with them and my OLW ... well, the less said about THAT the better! Earlier in the summer I signed up for Big Picture Classes Big Idea Festival so now I've got more projects that aren't getting done. Yes, I suppose I could be a teensy bit over stretched! :) Add to that the fact that I've now signed up with Stampin' Up! and am trying desperately to learn all I can about the company, their products (I'm mostly familiar with them already thank goodness!) and the business of being a demonstrator for them. It's a ton of stuff firing at me at the same time. No wonder I'm feeling overwhelmed!

Anyway, I'm going to try and get into my craft room today to do some scrapping - if the girls will play nicely! I had an hour to myself last night to get some sales calls made and the promise of another hour tonight to make some more, so I think I can put aside the crafting business in favour of the crafting business for a bit. Wish me luck!

Friday, August 12, 2011

MotherLOAD Catch up.

I've been doing my MotherLOAD assignments but I've just plain old forgotten to post them. Whoops! I've also been SUPER preoocupied with other stuff that I am hoping to post about soon. I'm just not sure yet what form that post will take so stay tuned ...

Back to MotherLOAD. I last posted about Week 4 where the theme was "use what you love, lose the rest". Week 5 we were talking about cutting corners - not literally, but in a more "scrapping faster" kind of way. We had taken notes about our usual scrap process in Week 3 and now we were to revisit those notes and find ways to shave off time. To be honest, I'm not sure where I'm wasting time. I've gotten into the habit of pre-printing a whole stack of photos at once so when I want to scrap something, they are ready to go. I do sometimes spend forever picking my papers - trying to find the "perfect ones". So I can endeavour to make decisions faster there. Harkening back to my Embracing Imperfection workshop, I can embrace what I have and use it. Perfect or not. Oh, and through the process of using my old stash during Apron Strings July challenges, I now am more intimately acquainted with my stash so digging through it to find the right papers doesn't take nearly as long! I can also get bogged down in photo and embellishment placement but if I find I'm having trouble, I know that turning to a sketch can be a real life saver.

Lain challenged us to create a layout in only 30 minutes. Set a timer and go for it! I created this.

When I'd finished I actually had to check my phone (I was using it's alarm clock) to see if I'd set it correctly as I was sure I'd gone over the 30 minutes but the alarm hadn't gone off. Clearly something was wrong with my phone! But no. It took me 29 minutes to complete this!

Products used: Cardstock - Bazzill; Patterned paper - DCWV Nana's Nursery Baby Girl stack; Journalling tabs - Jillibean Soup Journalling Sprouts Circle in Brown and Colorbok Sticky Journal Stax Pastel Baby; Alpha's AC Thickers Stroll Glossy letter stickers and Jewelry Box Chipboard number stickers; glitter embellishments - from stash, manufacturer unknown.

In Week 6 we started focussing on Journalling and the challenge was to start our layouts with the journalling. Plan for it from the beginning so as to ensure there was enough room and that everything else supported it. I was so inspired I actually made 2 layouts (I'm a keener that way!) When I was looking at the stack of photos from our trip to the PNE in 2009 I knew I wanted to include a page about it in Paige's album but most of the pictures were of Marley on rides. What to do? Make two pages!! One for Paige's album and one for Marley's. I started by writing down my journalling for both in my new notebook dedicated to such things (another Lain prompt) and then transferred it to some Basic Grey paper which I cut out on my Cuttlebug.

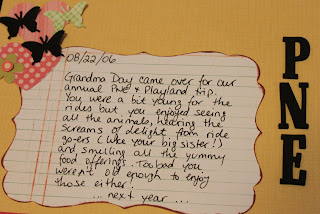
Here's the layout for Paige.


Products used: Cardstock - Bazzill; Patterned Paper - Nana's Nursery; Scalloped cardstock - from stash; Alpha's - EK Success Sticko dimensionals Large Black Foam; Butterflies, hearts and circles cut out with Marvy punches from scraps of Nana's Nursery and black cardstock; Flowers - Heidi Grace dimensional flowers Day Dream Believer; Word stickers - Bella Blvd Sunny Happy Skies and Plastino; brad - from stash.

And here is Marley's.


Products used: Cardstock - from stash; Patterned paper - Echo Park Dots and Stripes and Bella Blvd Sweet Celebration's Stardust, Hello Beautiful's Borders and Blocks (the B-side) and Swing Into Spring's Rainbow Ribbons; Arrow - Basic Grey Element Stickers from Sugared; Labels and stickers - EP Dots and Stripes, Bella Blvd Plastino and Firty; Punches - EKSuccess Open Scallop and corner rounder.


Well there you have it. The other thing I wanted to share with you today was my continued efforts to reorganize my scrap space. While the girls were at Granny Camp and Greg was laid up recovering from his "procedure" I got busy in the office. Greg and I actually share the space but I think I am slowly pushing him out! :) As my stash takes up more and more room, his computer gets more and more hidden. If my new business venture (hint, hint, hint) takes off, he may have to leave altogether so we can claim that office as a tax write-off. We'll see.
Anyway, here are some pictures of the new space.

A friend of mine was getting rid of all her scrapbook supplies and I snapped up this paper rack and the Clip It! display. I love, love, love being able to see all my cardstock and my most used papers!! I also love how the new arrangement has opened up the space. Even though the amount of stuff remains the same in there, the new configuration allows for much more ease of access. Always a good thing!

I used to have to move this 3-drawer unit all the time to access the lower shelves of one of my bookshelves. No more! Now I can grab alphas as I'm working or rummage for ribbon to match my project. The added bonus of having all those tempting rolls of ribbon effectively hidden from LC is AWESOME!!!
I managed to get all the stickers and rub ons from my bin onto the Clip it ... now the bin has another use!!


This is where I moved my bookcase to. I used to have all my final Interior Design project boards tucked into this corner but they are destined to find a new home somewhere else. Currently they are still hanging out in my living room ... but soon I will move them! Maybe the garage. Maybe the bedroom - where the giant vase with all my rolls of drafting paper and old projects went. The boxes in front of the big bookcase have (from the bottom up) fabric and other sewing supplies for when I get my sewing machine fixed and start sewing again (HA!!!), old scrapping supplies that will be going to Paige's kindergarten class, and miscellaneous "stuff" that is still waiting for a permanent home.

Take a close look at that middle box. It used to hold my stickers and rub ons. Can you see what it holds now?

Oh, and a view of Greg's little corner. Yup, it pretty much looks like this on any given day. And nope, the mess is not mine!

Well, thanks for tuning in again. I've got a big day tomorrow so I'm going to head to bed now. I will try to get back on here on Sunday and let you in on my little secret. Until then, have a great weekend!

Friday, July 22, 2011

Apron Strings Days 14 - 16

No 5 on Friday today I'm afraid. I've been too busy getting this weeks Apron Strings Out With the Old, In With the New Challenges completed. Without further ado ...

Day 14: use an older kit that contains paper with polka dots. Combine that older kit with your newest rub-ons or stickers.

I used the sketch above (that Lori provided for us) as inspiration for this. 
Old papers are some Basic Grey that I've been hording and the new stickers are ones from Sassafras as well as the picture frame from Studio Calico.

Here's the left hand page. 

And the right hand page. 

Close up of the title and journalling work. (That little heart is one of the new stickers!) 

Another close up of the embellishments. 

Products used: Cardstock - Bazzill; Patterned paper - Basic Grey, Olivia and Basics; Alphas - AC Thickers Sprinkles in white; Punches - EK Success Large Edger Circles, Marvy medium scalloped heart, MS Punch all over the page Butterfly, Marvy 1" circle; Tag - Bazzill Chips Chipboard tags; Journalling tags - LYB Boardwalk Journal Tablet, Jillibean Soup Circle Sprouts in white; Frame - Studio Calico Wood Veneer Frame misted with Tattered Angels Glimmer Mist in Brick and Tsukineko Walnut Ink Antiquing Solution; Stickers - AC Remarks from Surprised, Sassafras Cardstock stickers from Sweet Treats; other - Paper Whimsies in Retro and Head Count from Sassafras.


Day 15: take out your oldest kit that fits the newest style challenge. FREESTYLE. Freestyle is freedom. There are no rules, you just play: doodle, sketch, outline photos with pens instead of matting them, the look (or if you're brave your own hand) of hand-drawn titles and shapes, free-form designs. Playful.

As you can see, I had a lot of fun with this layout. And I really like it so I guess the moral of the story is to have fun while you're creating!!


I drew around some chipboard alphas to get the title and then coloured in the #3.

Playful to me means lots of cute embellishments and stickers!!

Products used: Patterned paper - Imaginesce Twitterpated line, Mushroom Fancy, Hey Foxy, Colorful and Flower Trails; Punches - EK Success Open Scallop, corner rounder, Marvy medium scalloped heart and 1" circle; Alphas - Crate Paper Crateboard Alphas from Wildflower; Stickers - Bella Blvd from Sunny Happy Skies, Flirty and Plastino; ribbon - from stash; white cardstock - from stash; tag cut out on my Cricut using George Basics.

Day 16: Use your oldest Apron Strings kit (no kit? Then your oldest papers and embellies) with big bold strips. Be sure to incorporate the color red, something round and rings.

Stripes? Check. Circles? Check. Colour red? Check and check.


Products used: Cardstock - Michaels; Patterned paper - AC Tea Party; Ribbon - Offray Red Grosgrain ribbon; Doilies - MS Die Cut Lace Tags; Alphas - Recollections Alpha Adhesive Stacks; Buttons - Daisyd's Tiny Treasures Assorted Buttons; Brads - BG.

That's it. Thanks for checking them out!

Thursday, July 21, 2011

Apron Strings Day 13

The challenge for Day 13 was to use your oldest kit with the scariest (to you) embellishment in it and combine it with a new embellishment or paper that has no "scare factor."

At first I thought I'd have to fudge the scare factor as there isn't much in the scrapping world that scares me but then I remembered the little bag of rub ons I have in my stickers/rub ons box. Ah, rub ons. I can never figure out how to use them effectively and I just plain old prefer a 3-d look to my embellishments.

So this morning I dug out my bag, grabbed some pictures from my pile and got going. Here's what I came up with.

So my "scary" is the rub ons (see below for close ups of them all) and my "not scary" is the papers and my new punch (purchased BOGO at Precious Memories!!)


As you can see this title rub on didn't work out too well. Also, you can't see it too well. I may go back and change this at a later date ...


This is my favourite one. Maybe because it came out the best but maybe because I used it in a not-scary way - as an embellishment to my not scary paper strip.
I don't think I'm sold on rub ons yet (although I see that Lori is encouraging us to use them again as part of Day 14's challenge!) I prefer stickers and other embellishments and will likely go that route 98% of the time! But it was good to play with them again. It's been awhile!

Products used: Cardstock - Bazzill;  Die Cut paper - Best Creations; patterned paper - AC and MME; Rub ons - BG Stuffy and K&Company Brenda Walton Small Wonders Girl Words Rub Ons; Punch - EK Success Large Edger Scallop Daisy.

Speaking of my punches ... the organizational bug keeps on biting. I got out my label maker this morning and put the names of each punch onto them. No more surfing the internet sifting through hundreds of punches to find the name of the one I've used for my page!

Saturday, July 16, 2011

Apron Strings Days 10 & 11

Good to know that when I'm down to the wire I can crank out 2 layouts, photograph them, edit them and then post them in ... when did I last post? 4 hours ago? Oh and I also cooked dinner. Fish and chips but who's counting?

LOL! No, I'm no superwoman - just getting faster at this scrapping thing. Also, all these "use your scraps" challenges have made me very aware of what I have, exactly where it is and how I like to use it so it's easy to grab what I need quickly. 

Day 10's challenge was to: use your LEAST favorite kit and combine it with something new you really love. Well, it's been well established that I don't get the Apron Strings kits (yet?) so I went digging through my old papers for some of my least favourite or oft passed over for other "prettier" options, if you prefer. I actually recently put my least favourite papers into a box to give away (see this post) so I was a little stumped with this one. But I have a whole drawer full of papers that I regularly skip right past in favour of others so that's where I went. This is what I came up with.

The new is 3 fold. The vinyl letters, the tag and the new way I love to group embellishments.

Here's a look at the journalling block.

Products used: Cardstock - Bazzill; Patterned Paper - K&Company Snuggle Bug Designer Paper Pad; Buttons - Daisyd's assorted buttons; Flashcard - K&Company Alphabet Cards; Tag - AC Bits Decorative Tags from Confetti; Quote - DCWV "Girls" Cardstock Quote Sticker Stack; Journalling tags - LYB Journal Tablet Boardwalk and Cupcake Love; Ribbon - Ki Memories playful plaid; Border punches are EKSuccess and MS; Alphas - Thickers Vinyl Letter Stickers.

Day 11's challenge was to: grab an older kit that contains a stripe or plaid patterned (you can use whatever other papers are in the kit you pick, but one of them should be a stripe or plaid) and combine that with something newer and round and something newer and soft from your stash.
This was fairly easy as the stack I'm currently using for the majority of Paige's album is both old (I've had it for about 3 years now) and contains striped and plaid papers. So I picked a couple that went with the pictures I'd chosen and got to work.
The something round is the round scalloped cardstock behind the pictures as well as the button embellishment. I also had a pile of Sassafras felties so went nuts with them as my something soft.

Some close ups. 

Products used: Cardstock - Bazzill; Round scalloped cardstock - from stash; Patterned Paper - DCWV Nana's Nursery Baby Girl; Quote - DCWV Clear "Vacation" Quote Sticker Stack; Journalling tags - LYB Journal Tablet Boardwalk and Cupcake Love; Border is MS; Alphas - Sassafras Kelly Green Glitter Alpha; Embellishments - Sassafras Felties from Peddlars and Puddle Jumpers, Sassafras Blooms from Mod Pods; Button - AC Flair Sew cool.


Well, I think I may have managed to squeak them all in this week once again! I've really got to work on each challenge the day it's posted and not leave so many to the last day!! Maybe next week.

Enjoy the rest of your weekend everyone. We went to a very wet ceremony today for the Portraits of Honour Tour. Both Marley and Paige ended up laying a rose on the Cenotaph. It was actually extrodinarily moving to see all 155 (plus 2 that are only sketched as their deaths are so recent) faces of the members of Canada's Armed Forces that have given their lives in Afghanistan. The pouring rain was a bummer but very fitting.

Wednesday, July 13, 2011

Apron Strings Day #7

As per usual I am running a few days behind (I just saw that Lori has posted Day #9's challenge!) But ... where was I? Day #7 was a colour scheme challenge using older papers. Check out the colours ...
Pretty bright, huh?
But I wasn't worried for a second because I knew that the papers I have been using all along for Paige's baby album (and Marley's before) has this exact colour scheme. Awesome, right? Talk about fate! I grabbed some pictures I'd printed a couple weeks ago, which also happened to have the pink and green in them, used the sketch Lori had given us on Day 6 and came up with this.

Smiles & More

Some close ups. 
Weren't they cute? Marley at 2 1/2 and Paige at 3 months old. Awww!!!


For the title (something I laboured over - do you ever do that?) I eventually used a 0 to circle one of the words on my paper and added the rest of the title beneath it. This particular pattern from the stack is my all time favourite!
To make the flower I cut out some flower shapes in my Cricut in a couple of different patterned papers then roughed up the edges before inking them. I wanted a real 3-dimensional look to the flower so I sprayed each layer with unshaken Pearl Glimmer Mist (so it was really mostly water) then immediately scrunched the paper while it was still wet and pliable. Once it dried it stayed all curled up. I added the button and then decided to add them to the other side of the layout too (see below).

The brackets were also cut out with my Cricut.

And here are those other buttons I was talking about. I sewed one onto each little dress.

All right, one more down.
For Day 8 were are to try a new technique so I'm going to attempt to make a flower like this one by Kailyn Siebert.

This one is made with crepe paper which I don't have any of but I do have some fabric paper stuff which I thought might work. So far it's not going very well though. Grr! Wish me luck!